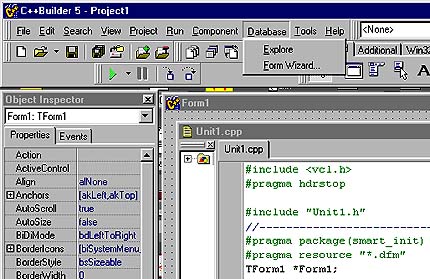
The IDE will open with:
- a Menu of controls
- Form1 (Window)
- Unit1.cpp (Source code)
- Object Inspector

The Object Inspector allows you to change the attributes of any object (component). The first object shown is Form1.
Click on the Properties tab. You can set its NAME (what it is called in the program), its CAPTION (the label that the user sees), its COLOR, HEIGHT, WIDTH, TOP and BOTTOM. You can resize the form by dragging it. The properties will change reflecting what you've done. You can also change a components properties on the fly inside your program. We'll do that later.
Click on the Events tab. You can tell the form what to do when the mouse moves over it (OnMouseMove), when the mouse is clicked (OnMouseDown) and when it is rendered on the screen (OnPaint).
An object (component) also has Methods. These are things that it can do. We will look at these later.
You might think of a component as an agent with a Sense, Think and Act (STA) architecture:
- Events = Sense
- Properties = Think
- Events = Act
We'll leave the question of what "thinking" is until later. Some researchers define it as whatever mediates between sensing and acting.


Click on the "System" tab. It gives you access to the system clock and provides you with a PaintBox component which is useful for creating visualizations.

Click on the "Samples" tab and explore some useful graphing components.
The "Dialogs" tab gives you components for reading and writing data files.

We have added some components at the rightmost tabs:
- Ziegler (knobs, dials, meters,
charts and displays).
A demonstration program is available. Click the image. - OpenGL (for 3D visulization and exploration of data spaces).


Make sure the Properties tab in the Object Inspector has been chosen.
Notice that the button's Name, by default, is "Button1". This is it name as it is known to the program code. We have no need to change its name. Leave it as it is.
Notice that the button's Caption is, by default, the same as its Name. The Caption is simply the label on the button. The program pays no attention to it. Only the user sees it and so it's useful to give it a Caption that will indicate its function. Change the Caption to "Run".
Now let's write some code to tell the program what to do when the button is clicked. Double-lick the button, or double-lick the "OnClick" box on the Events tab of the Object Inspector. They both accomplish the same end. An "event handler" will be automatically written into your Unit1.cpp file for you. All you need to do is fill it in with something to be done.


Let's run the Windows application that you've built. Click on the green "run" arrow to compile the project and run. Notice that there is also a blue "pause" button alongside.

The application should look like this. You can minimize, maximize and close the application. If you press the Run button the program that you've written will run, but you won't see any evidence of it. Press it, see that nothing happens, then close the application by pressing the "X".
Let's look at a neat feature of the IDE that lets you probe what is going on inside your program. Press the green "run" arrow again and DO NOT click the Run button that you created. Now press "pause" instead.


Scroll up in your Unit1.cpp file until you see the name of a variable you want to probe. Place your cursor over the word "array" but don't click it. The current values of that variable array will pop up in a yellow window. We can see that the array is full of zeros. That's the way it should be, because we never pressed the Run button that would execute the code.
Slide the cursor over "i" and see what the popup window says.
Press the green "run" arrow to resume the program, then press the black "X" to close it.

This time let's see if the probe can show us what is in the array after we press the Run button we created.
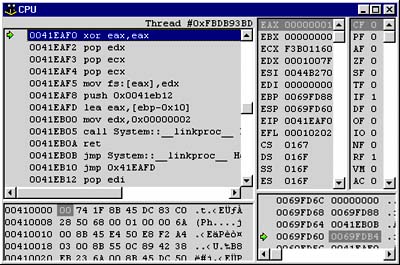
Press the green "run" arrow. Now press the "Run" button we created. Now pause the program, close the CPU window and slide your cursor over the variable "array". You should see the current values in the array.
This method is extremely useful in debugging your program.
